The Story of My DIY Custom Mechanical Keyboard: The Lily58 Split Keyboard
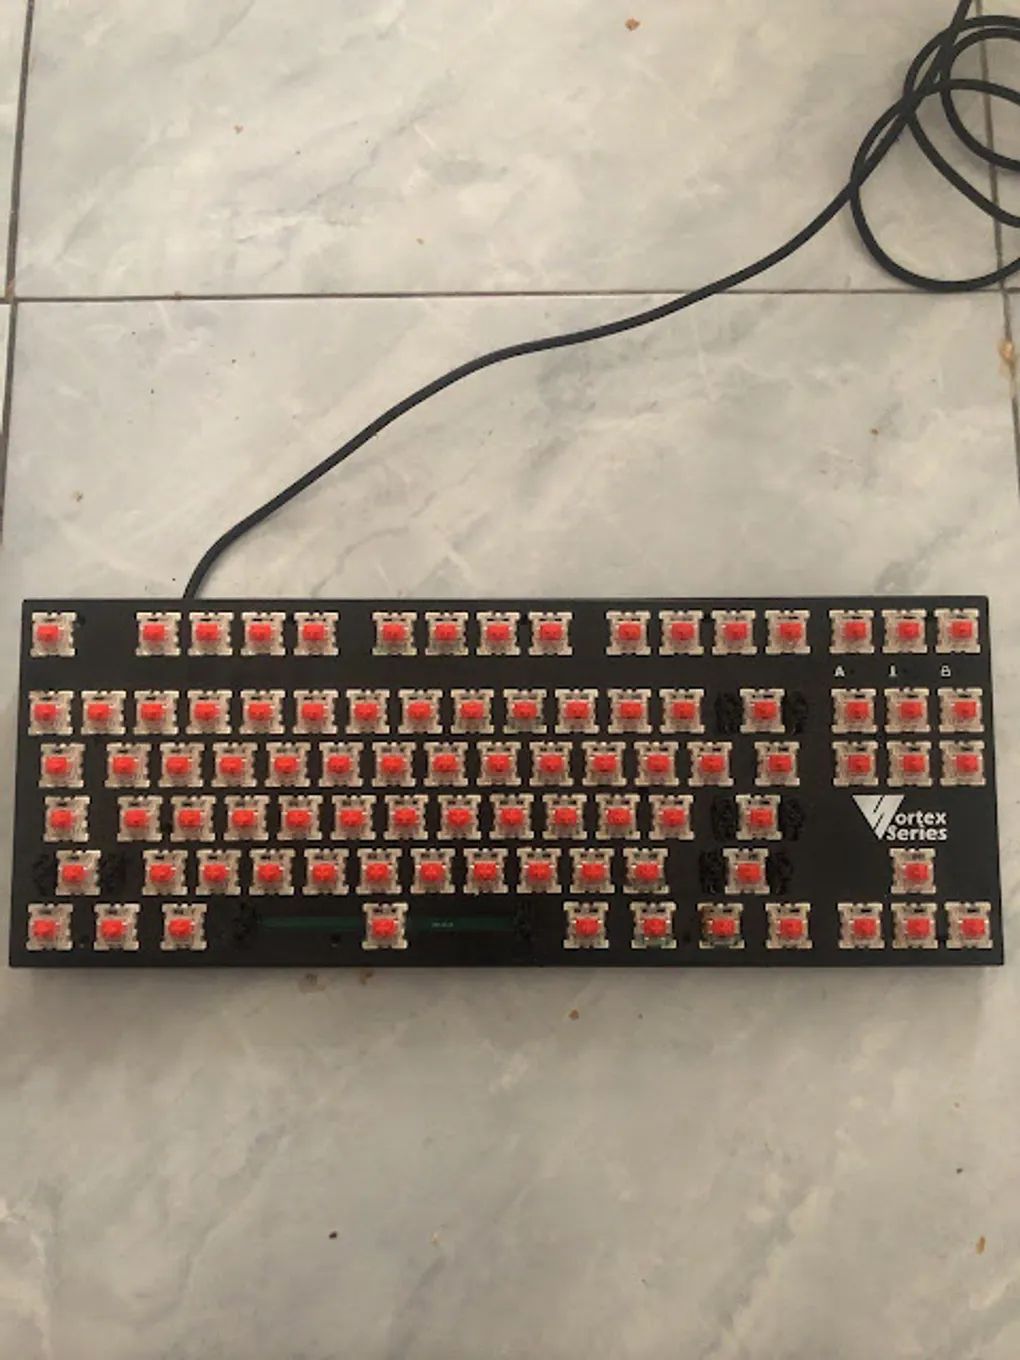
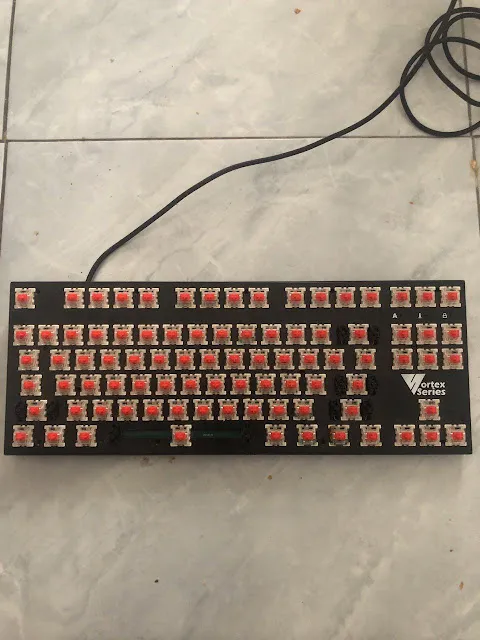
Hello DIY enthusiasts! Today I’m sharing my personal journey into the world of Custom Mechanical Keyboards. My interest actually started recently, around the end of Ramadan 2020. It all began when a friend (whom I call Bang Dayat) posted a photo in our Telegram group. He was looking to donate a mechanical keyboard—a Vortex Series 7 (VX7). I was immediately interested, even though it came with one condition: it needed keycaps before it could be used. Bang Dayat recommended buying used DA Gaming (Digital Alliance) keycaps for about 100K IDR. Thankfully, that keyboard is still going strong today and has even undergone a case upgrade!
 |
|---|
| My first mechanical keyboard: Vortex Series 7 |
Before diving into building my own, my first impression of using a mechanical keyboard was how different it felt compared to standard ones. I used the VX7 for about two weeks to truly understand the experience. It was comfortable and suited my hands perfectly. Since I’m an Electrical Engineering student and had a background in Electronics during vocational school (SMK), the idea of building one from scratch didn’t seem too daunting.
Bang Dayat and I decided to build a split keyboard model called the Lily58 (originally designed in Japan). We faced an immediate challenge: the original Lily58 PCB design is multi-layer, but our previous experience was limited to single-layer designs. We decided to take a bold step: translate the multi-layer design into a single-layer one that we could produce ourselves. I took on the task of “translating” the paths, while Bang Dayat reviewed the results and researched the component layouts.
This research and translation process took about a week. I even brought my laptop while on a beach trip to Gili with friends just to keep the progress going!
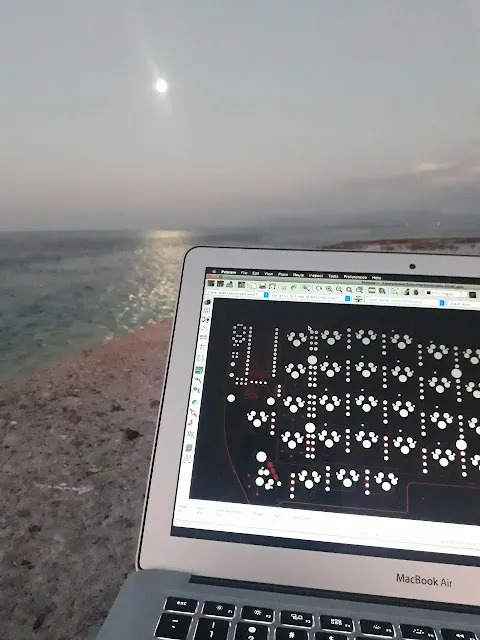
While enjoying the beach, I managed to complete 50% of the right-side split. After coming home, we bought the necessary components: PCB boards, diodes, resistors, TRRS jacks, reset buttons, and ordered Pro Micros, TRRS ports, screws, and OLED screens online. Since our tools were minimal, we worked at Bang Rizal’s house, a hub for local electronics and IoT hobbyists.
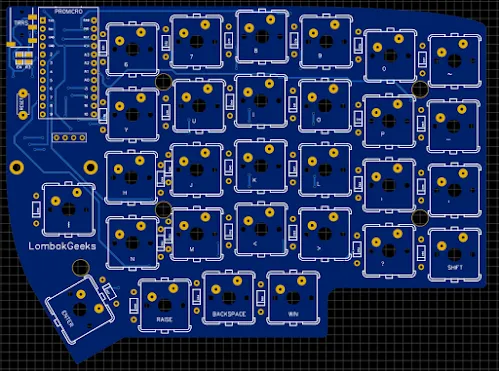
Bang Rizal actually simplified the multi-layer design for us, making our week-long single-layer research somewhat unnecessary, but it was a great learning experience regardless!
 |
|---|
| PCB design by Bang Rizal for the LombokGeeks community |
We used a CNC machine to drill the holes. It was a learning curve—we broke a few drill bits on the first try! For the circuit paths, we used the “toner transfer” method: printing the layout with an HP LaserJet on photo paper, then ironing it onto the copper PCB. After several failed attempts where the toner didn’t stick perfectly, we finally got a clean transfer.
The etching (dissolving the unused copper) took about 6 hours because our chemicals were old. I stayed up from 1 AM to 6 AM just watching the process!
 |
|---|
| The etched Lily58 PCB |
Finally, after three days of design, drilling, ironing, and etching, we had our boards. For the left side, I even hand-drew the paths with a permanent marker. We then soldered the components and used QMK Firmware to program the keys. Initially, the second row on my right side didn’t work. After some troubleshooting and rewiring, everything functioned perfectly!
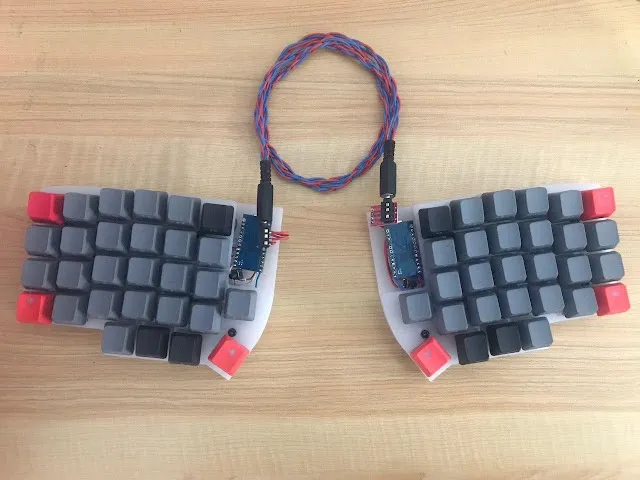 |
|---|
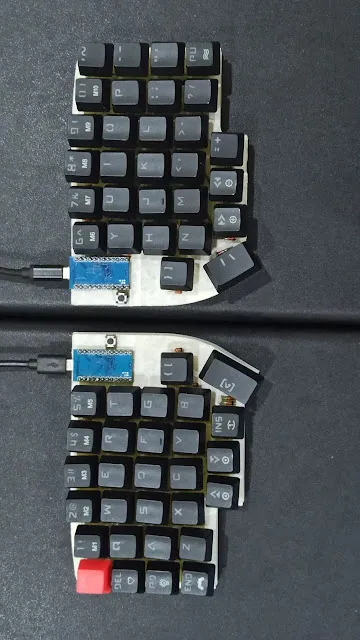
| Lily58 Custom by Bang Dayat |
 |
|---|
| Lily58 Custom by Bang Anwar |
Building a custom keyboard is a high-effort but incredibly rewarding process. You learn about electronics, firmware, and ergonomics. The best part? You can map the keys exactly how you want. One button could be space, or enter, or a macro—whatever suits your hands.
If you’re interested in building your own, I highly recommend trying it. It opens a new world of technical knowledge.
Technical Links:
- UNK build by Herpiko: https://github.com/herpiko/unk
This post was written entirely using my Lily58 Mechanical Keyboard!